SUPPLIES:
Stampin'Up! Ornament Punch
1 1/4" Circle Punch
Cardstock (Green and Color of your choice)
Sponge Dauber
Classic Ink in Darker Shades of Cardstock Colors
2 Way Glue Pen
Stylus (pencil or screwdriver will work also)
Scoring Instrument
 Using the STAMPIN' UP! ORNAMENT PUNCH, punch 18
ornament shapes from your chosen cardstock. Sponge the edges of each petal on
both sides. Punch a 1 1/4" circle from matching cardstock. This circle will be
your flower base.
 Next, use a pencil, stylus or screwdriver to tightly
roll the edges of each "petal" from one side to the other. Set each one aside
until all are curled.
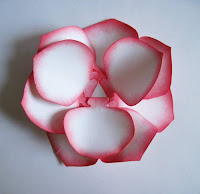
 Begin creating the rose by placing the curled petals
around the circle base as shown to the left. I used 7 petals to create this
layer for coverage and fullness. I alternated petals - one curled up, the next
curled under - overlapping each petal and the petal tab as I worked around the
circle.
 The second layer was created by using 3 petals ,
curled inward, glued to the edge of each petal tab on the previous layer.
The next time I will use 5 petals in this
layer.
 The 4th layer you begin creating the center of the
rose. You will use 2 petals. Bend the base tabs at 90 degree angles to the petal
and glue the tabs together. Roll the both petals inward creating a cylinder.
Apply a small amount of glue as shown on both sides of one petal and hold both
petals together with paper clips until dry.
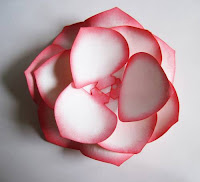
 To create the 5th layer - which is the very center of
the rose - roll the last ornament shape tightly around the stylus. Add
a small amount of glue to the inside edge of the center petal and clip it with a
paperclip until dry. Once dry, fold the base tab at a 90 degree angle so that it
lays flat across the bottom of the petal. Put a dollop of glue in the center of
the rose and put the final petal in place.
 To create the leaves, punch 2 or 3 ornament shapes
from a green cardstock. Using the stylus and a scoring tool (personal cutter,
scorpal, etc) create the veins as shown to the left. Turn the "leaf" over and
sponge a darker green ink across the veins and along the edges of the leaves.
Glue into place on the back of petals as desired.
And that's it! A beautiful PAPER ROSE.

A Rose by any other name is..... hummm... what???


No comments:
Post a Comment