Tuesday, October 11

Let the Bellas Toile!

OK that was a silly title.... I was trying to be funny... but these cards definitely are not funny... they are beautiful... especially if you're a "black and white" freak like me!

 
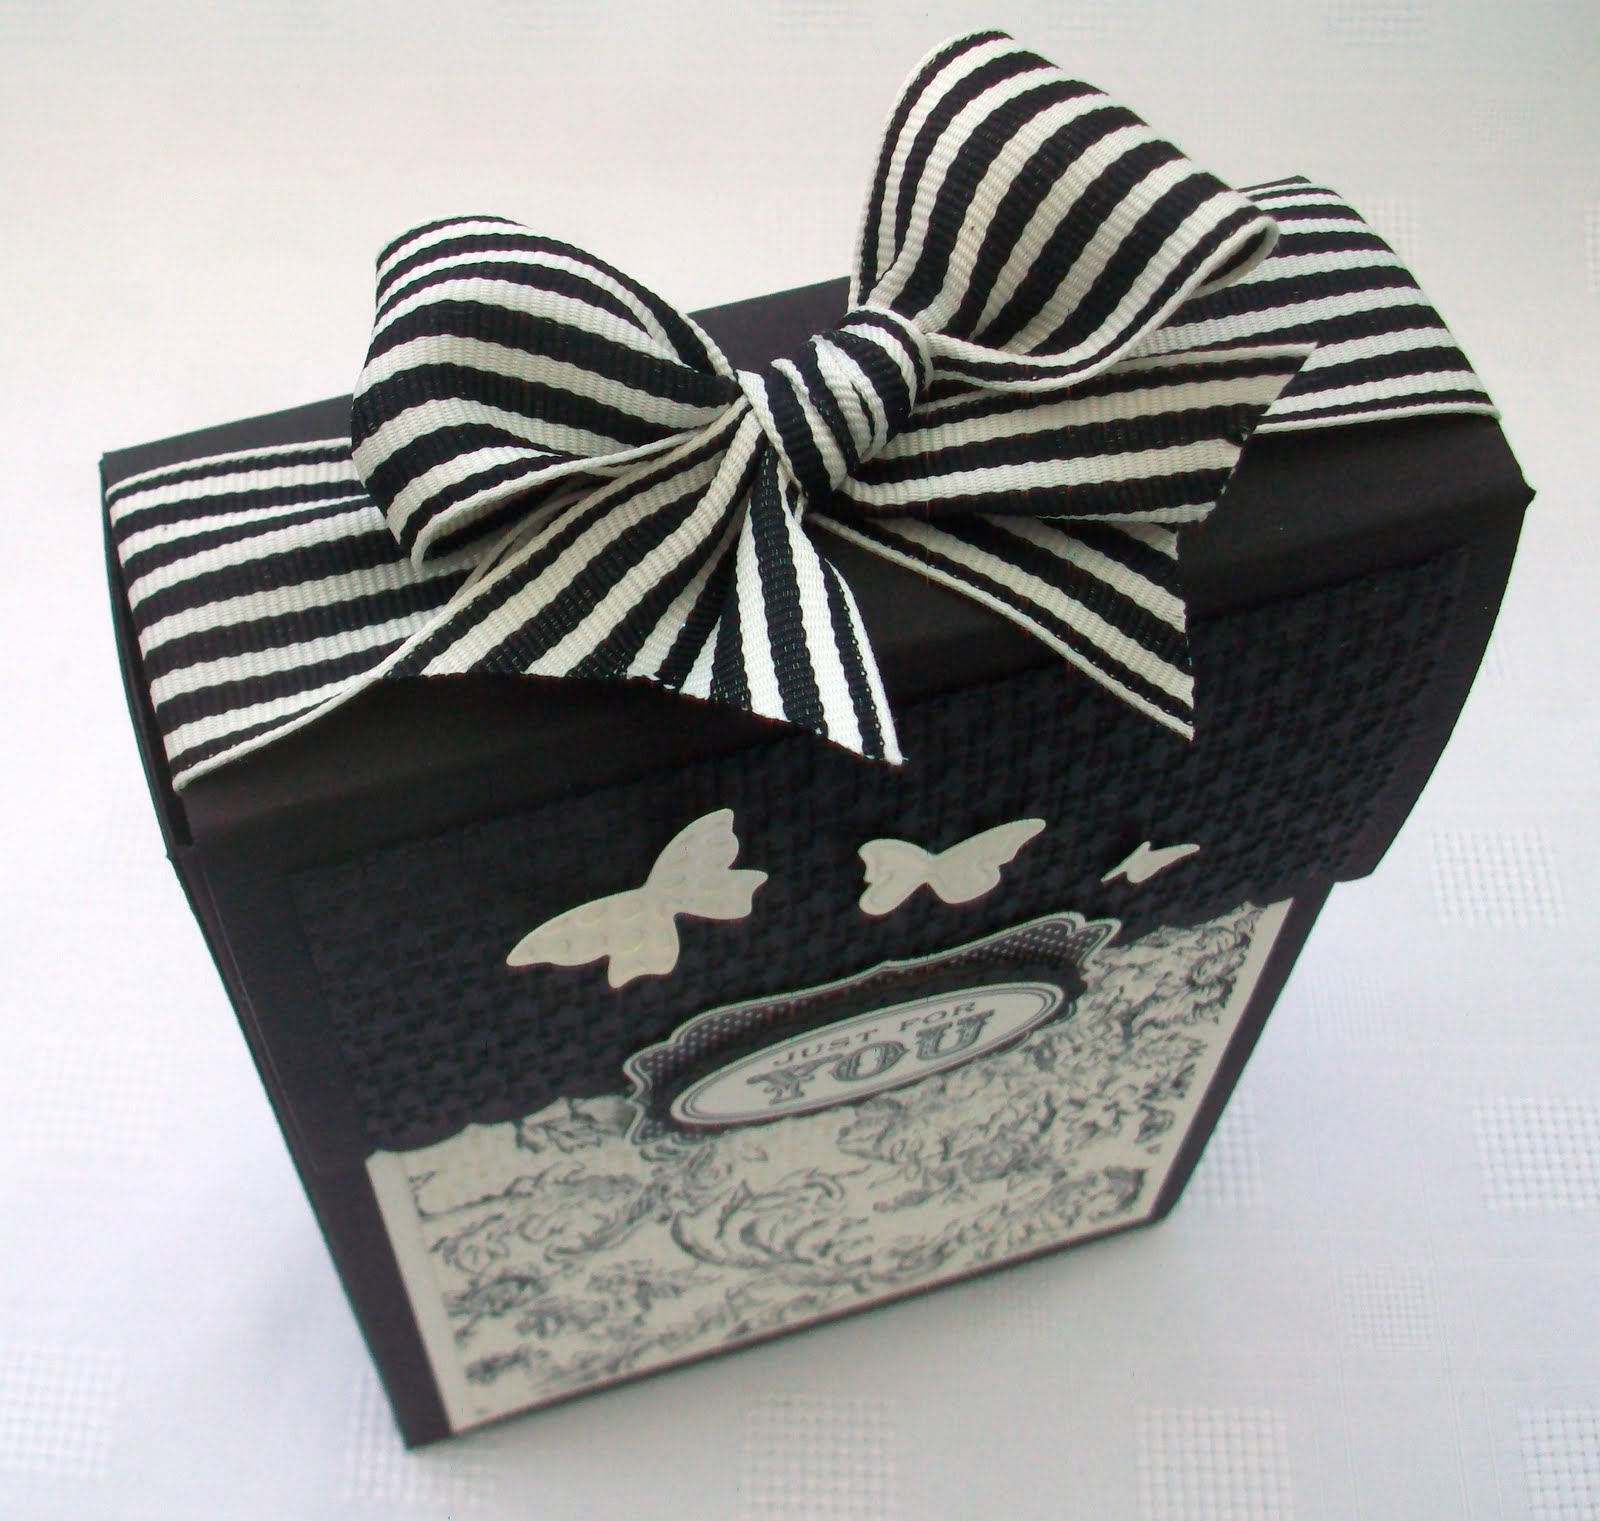
The Bella Toile Background stamp is incredible.. or should I say was incredible... as it's retired now.... using just Black and Vanilla cardstock, it's so very elegant. Used here with the Four Frames and Oval All stamp sets... now who wouldn't love to make these!


Whenever you do make a stationary box, remember you don't have to put stationary in it... might be cute with a bottle of perfume or some delicious chocolate.. or both!!!


The box is topped off with some 1 1/4" black stripped ribbon.

Doesnt' this just scream vintage and elegance and European!!!

Monday, October 10

Jack of All Trades......

Here's a darling collection of jack-o-lanterns... or simply put... Pumpkins!


You guys know we have Stampin' Up all over the world... right? Well Jenny  Moors is from the UK and is a fantastic Demonstrator... and apparently has a terrific pumpkin patch garden growing too.... They've grown a new version of Winter Squash this year called Turk's Turban... they look weird but are so colorful... wonder what they look like inside... hummmm....
 
 
Demonstrators in the UK have a slightly different SU Catalog than we do here in the states... some of their stamp sets are different and they have some different DSP and cardstock...  these cards are made from A Jack of All Trades stamp set plus some co-ordinating papers called Frightful Sight! It's a fun stamp set and would be great for some scrapbook pages for Halloween.
The pumpkin is stamped in Tangerine Tango.


Just Believe image is used with this next pumpkin.....
 
This is the basket with the pleated rosette on the front. These papers all co-ordinate with Cajun Craze, Cherry Cobbler, Old Olive and Black. She used the eyelet border punch for the handle of the basket.


Come back and visit tomorrow and I'll show you some darling cards she made using the black and white Belle Toile paper.... Cherrie-O!

Sunday, October 9

Outing at the LA County Fair

Last weekend Brayden got to spend the night with his Grandfather and Grandma Darlene in Fontana They took him to the LA County Fair to see all the animals... looks like they had a blast!!!

 Checkin' out the baby chicks....


Peek a boo... can you see us?


That's a funny lookin' doggie....


Turkey in the hay .. or is that Brayden???


Big Pig....


Big Cow......


Cow-a-bunga.....


Time to get a treat.....


What is that thing?.....


Wow that was fun!...


But the noise is getting to me..... let's go!


Great memories made and shared.

Saturday, October 8

Smashed Paper Roses

How do ya like 'dem Roses?


Once again, it's Quilling and Stamping combined!!  Judy Marshall made this Tutorial..... She started out by quilling the roses from scraps and then when finished, realized they wouldn't fit in the envelope and so came up with plan B... just smash those little suckers!

Purchase a quilling tool from you local craft store, if you can't find any of these little tools near you I'm sure you could make your own by snipping off eye of a tapestry needle and inserting it in a soft wood dowel.


I punched out circles from scraps, these are really small roses.....Then I cut the circle in a spiral to the centre...

So I basically cut with my scissors in a spiral, just randomly and left a little piece at the end for a glue dot...this is what it looks like when I'm finished cutting.

 
I insert my quilling tool on the very tip of the outside edge and start to roll.....

and roll.......

and roll.....


When I'm finished rolling it all up,
I let it rest on my finger tip to let it relax and unroll just a bit ...
Then I place a glue dot on the end....

And press it gently so that it catches the rolled layers
of the flower at the base.

 
This is what it looks like....pretty eh?
This is me looking at it and thinking that it's going
to be a very lumpy envelope.....

 
And here is where I spotted my Tombow and thought hmmmm....


Here's me really applying pressure with the bottom of the
tombow to smash my pretty rose....
 
And here....gasp....the reveal!!
I love it....I think it's beautiful and it will fit into the envelope as well!


This is a picture of a 3/4" Wisteria Wonder smashed rose...
it's pretty just as it is or would be lovely with a dab of
Dazzling Details, or Dazzling Diamonds or even a pearl in the centre.


This is just to show you the two sizes I used for the anniversary card and of course those roses were all in white. You could make them any size but the bigger the circle the bigger the smashing tool would be...even the bottom of a jar would work great.
 
Here's the finished rose that's got the En Francais script stamped on it...so pretty!


Here's a a little grouping of the smashed roses, as you can see they turn out a little different every time! Remember, don't throw out your scraps...they are perfect for making these little gems!