Friday, October 31

Trick r'Treat

So are you ready for all those little Gobbins showing up on your doorstep tonight? Actually over the years I can count on one hand how many trick r' treaters we've had at the Reed Ranch.. but that's ok with me.. not really my favorite holiday.... but I do love seeing those "little ones"...


Trick r'Treat
Smell My Feet
Give Me Something
Sweet to Eat!

Thursday, October 30

Four Fold Card

Debbie Henderson made a very unique four fold card.... she graciously shared the step by step tutorial:


The top photo shows the card all folded up and ready for mailing while the photo below shows you how the panels open up to reveal the inside:


I've seen this card made with a 12" x 12" piece of cardstock but I decided that I wanted a smaller version for mailing, so I opted to adjust the sizes to accommodate an 8" x 8" piece of cardstock. I used the Maritime Designer Paper for the wonderful masculine patterns on this card.


The tag is made in two layers and I'll talk about that a little bit later. Let's start our project first. You will need a piece of Night of Navy Cardstock measuring 8" x 8". Score at 2" on all four sides as shown below:


Using the 2" sections that you created with score lines, add another score line at 4" on all four sides but stop the score line when you meet the first score line (no scoring in the center square):


Using your Paper Snips, cut off all 4 corner squares completely. Next you will cut one slit per side as shown in the photo below. Make sure you slit each side exactly the same and fold on all score lines:


Now that everything is cut as needed, let's decorate our card. We will start with the inside. Cut (4) squares measuring 1 3/4" x 1 3/4" using designer paper and glue in place at opposite corners. Cut a piece of Real Red Cardstock measuring 3 3/4" x 3 3/4" and glue to the center of your card:


Cut (4) pieces of Real Red Cardstock measuring 1 3/4" x 1 3/4" and glue to the remaining four squares.

Cut (4) Whisper White Cardstock squares measuring 1 1/2" x 1 1/2" and (1) piece measuring 3 1/2" x 3 1/2". Stamp all if the pieces using the Traveler stamp set with Real Red, Night of Navy and Coastal Cabana Inks. Glue all five cardstock pieces over the Real Red layers:


Fold each side over and punch a hole in the top square as shown, repeat four times for each side:


This is what your card should look like when all of the holes have been punched and all of the sides folded in:


Now we will create the tag. You will need to stamp the image from the Tag Talk stamp set using Coastal Cabana Ink on Whisper White Cardstock. Cut out using the Label Bracket Punch. Cut the tag shape using Real Red Cardstock using the Note Tag Punch. Layer the stamped piece over the tag using Stampin' Dimensionals. Use the 1/4" Handheld Punch to punch a hole at the top of the tag:


Thread a piece of Real Red 3/8" Satin Woven Ribbon through all of the holes of your card and add the tag to the ribbon. Tie the ribbon into a bow:

She made a coordinating envelope using the
Envelope Punch Board at a 4 1/4" x 4 1/4" size. 
 
 
And did ya notice the cute little spider web
painted on her index fingernail????

Wednesday, October 29

Fall Burlap Bouquet!

Pretty Paper Cards are made by Peggy Noe.... she used some goodies from the October Paper Pumpkin to create the card.... can you guess which items???
 
Sweet Posies 1
 
I'd do the same and rearrange Kit items to
come up with completely different ideas
than original purpose... love it!
 
Sweet Posies angled
 
The little burlap bag was cut in half,
then lined with the Tangelo Twist sequin trim.
The clothespin and the “sweet” stamp ~
both items were from this month’s Paper Pumpkin! 
 
Sweet Posies Insta
 
The Pansy Punch and the Petite Petals Punch made
quick work of the bouquet,
with a single sequin in the centers.  
She scrunched up the Hello Honey and Tangelo Twist
card stock after punching and then pulled
the petals forward with a bone folder.
 
Clever fer sure!

Tuesday, October 28

Pop of Peacock!

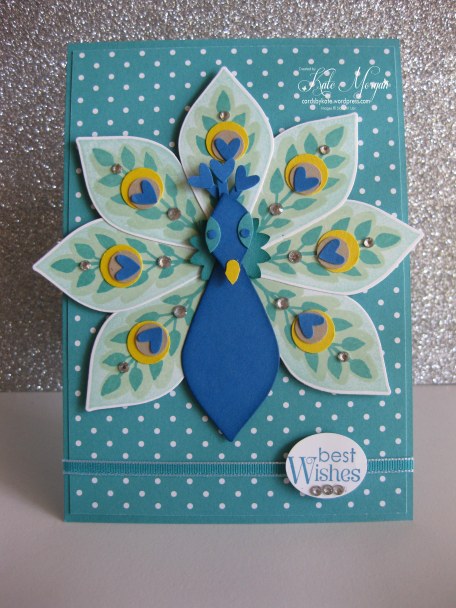
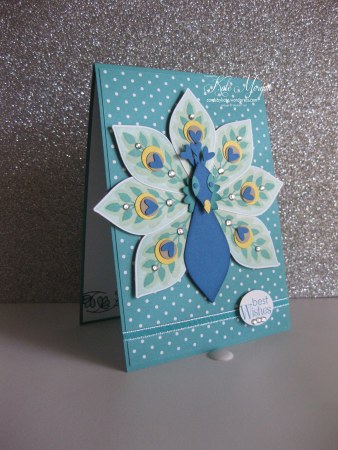
Wowie Zowie... this is amazing....  Kate Morgan created this super gorgeous Peacock card... 
 
Flower Patch Peacock

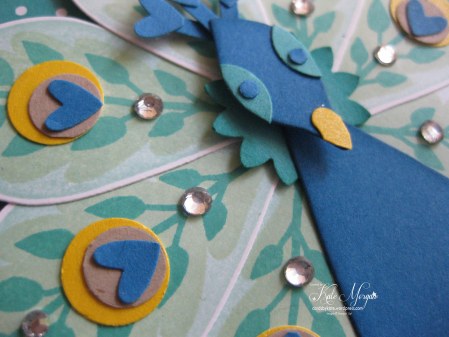
I started with a card base of Bermuda Bay and a layer of coordinating DSP. I then stamped the Flower Patch Photopolymer Stamps starting with Pool Party, then Pistachio Pudding then Bermuda Bay. I used the coordinating dies Flower Fair to die cut the images. The body of the peacock is Pacific Point card stock.

Flower Patch Peacock

I used the 1/2″ & 3/8″ circle punches and the heart is from the Owl Builder Punch.
I added some rhinestones to the feathers for some more interest and who doesn’t love a bit of bling?!!!.

I added the sentiment from the Petite Pairs Stamp Set in Pacific Point and used the small oval punch.

Peacock Flower Patch

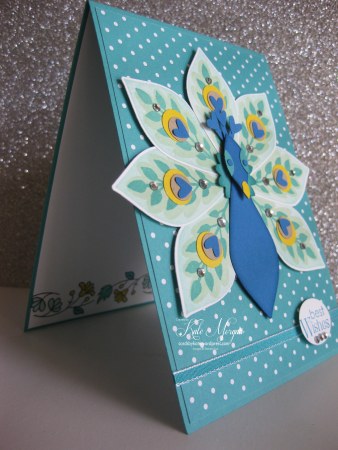
The inside of the card I stamped an image from the Bordering Blooms stamp set in Memento Black ink then coloured with the coordinating Blendabilities.

Flower Patch Peacock

I just can't stop starring at it!

Monday, October 27

May the Force Be With You

OK so I gotta admit...this is absdolutely adorable... it's Yoda from Star Wars!!

Yoda punch art

If you want to recreate the Yoda card, here's the punches you will need:

1 3/8 inch Circle Punch (embossed with Square Lattice Folder
Bird Punch (Yoda's signature earls)
1/2 inch Circle Punch (eyes, black dots are markered on)
Labels Collection Framelits Dies (robe/sleeves)
Word Window Punch (lightsaber, with rhinestone on handle)
Boho Blossoms Punch (feet/hands)
Confetti Star Punch (accents on background)
Itty Bitty Accents Punch Pack (small stars, Silver Glimmer Paper)
 
Now let's see if we can come up with a Wookie card!!!

Friday, October 24

Keep the Curvy Keepsakes Comin'

OK couldn't stand it any longer.. just had to share some more ideas for the holidays using the Curvy Keepsake die.. and then some!


Debbie's Designs: Curvy Keepsakes Box Die Owl!

Stampin' Up! Curvy Keepsake Box Die Pilgrim for Thanksgiving. Debbie Henderson, Debbie's Designs.


P1060190

P1060191

P1060194

P1060195

P1060186

P1060187

Not that this has to do with holidays.. but how cute are these too!

By Bonnie Beckman Langsdorf

Ninja turtle gift box using curvy keepsake die from stampin up


Cherry-O!

Thursday, October 23

Little Love Letters

That awesome Nikki Spencer's been at it again...look what she created with the partial die cutting technique.... make it a Love & Heart theme....

 
She used Naturals White cardstock, with
Crumbcake and Champagne Shimmer Paper. 
And also created a matching gift box,
using the Curvy Keepsake die and
the heart framelits with some window sheet.


Absolutely steals my heart!

Wednesday, October 22

LovePop

Found these unique cards from All Things Paper.....
So who wouldn't enjoy opening a pop-up card... the unexpected surprise is enough to bring a smile to the Grinch-iest of souls. Of course the holidays are still a few weeks away, but I hope you won't mind this introduction to a brand new line of greeting cards from a small startup called LovePop.

 
Pop-Up Snowflake Card - LovePop
 
Founders Wombi Rose and John Wise met while studying naval architecture and marine engineering in college. Led in different directions by employment after graduation, the pair reunited at Harvard Business School. A school project took them to Vietnam this past January where they were wowed by handmade three dimensional cards.

 
The LovePop magic comes from the sophisticated paper sculpture at the heart of every design. It folds completely flat, is securely attached to the card with thread, and perfectly placed so that opening the card is a total surprise and delight to see!
 
Pretty clever...
but then it's made using CAD software...
way beyond my expertise!

Tuesday, October 21

This is SO me.....

 
Hope you're having a fantastic day.... couldn't help but share this funny thought with you.....it is SO me......

 
Right now I'm having amnesia and deja vu at the same time.
I think I've forgotten this stuff before.


(and not coincidence that I posted it
day after my Alzheimer's message!!!)

Monday, October 20

Fun Formulas! (or How to Wipe Out Alzheimers)

I'm been reading and hearing more lately about how to wipe out Alzheimers... it's a huge concern and especially for women as we get older.... hey, My Brain Matters!!

OK so here's some fun little puzzles for you to do...... pretty amazing these work.. even with a calculator I'm not smart enough to figure out why... but at least they made me think!

Phone Number Formula

1) PUNCH THE 1st THREE DIGITS OF YOUR PHONE NUMBER INTO YOUR CALCULATOR
        (without the area code )

2) MULTIPLY BY 80

3) ADD 1

4) MULTIPLY BY 250

5) ADD THE LAST FOUR DIGITS OF YOUR PHONE NUMBER

6) ADD THE LAST FOUR DIGITS OF YOUR PHONE NUMBER AGAIN

7) SUBTRACT 250

8) DIVIDE BY 2

 
RECOGNIZE THE NUMBER?


Fun Family Formula

1. Write down the # of brothers you have
2. Multiply by 2
3. Add 3
4. Multiply by 5
5. Add the # of sisters you have
6. Multiply by 10
7. Add the # of living grandparents
8. Subtract 150
This will give you a 3 digit number:

1st digit = # of brothers

2nd digit = # of sisters

3rd digit = # of living grandparents


Keep your brain active every day:

  • Stay curious and involved — commit to lifelong learning
  • Read, write, work crossword or other puzzles
  • Attend lectures and plays
  • Enroll in courses at your local adult education center, community college or other community group
  • Play games
  • Garden
  • Try memory exercises
More information about the prevention of Alzheimer's disease.

share the facts

By sharing the facts, you can help us change the numbers. Each time you talk about Alzheimer's, you help raise awareness and inspire action.

Share the Facts Video

Alzheimer's Disease is a Global Epidemic

44 Million Worldwide Worldwide, at least 44 million people are living with dementia.
604 billion usd per year
The annual global cost of dementia is 604 billion in U.S. dollars.
2030: 76 Million People
the number of people living with dementia worldwide is set to skyrocket to 76 million by 2030.


Friday, October 17

Thursday, October 16

Fun Fall Framelits Wreath (+sweet treat!)

My new best friend blog... from Darla Watson comes another awesome idea for Fall...from Scrapp Happens Here!

It's woodsy, it's charming, it's warm and it's Fall all wrapped into one card! Made using the Hardwood background stamp. Cut the leaves out with the Fun Fall Framelits, sponge their edges with Early Espresso ink and use dimensionals to pop them up to give some dimension to the wreath.

 
 Did you notice how cute the little pumpking in the bottom is...
makes it look like it's leaning up against an old door or wall.
 
The pumpkin was punches with 3/4 inch circle punch
and run through the Decorative Dots embossing folder.
 
Then she took it a step further and made this adorable project with the Fry Box
 (you can hardly see it in the picture)...
plus I'm thinking you could attach this to any little box you have or make...


Make the Box out of Old Olive cardstock.
Use your Oval framelits to cut out oval and run
through the Decorative Dots Embossing Folder.
Ink with Early Espresso before adhering to the Fry Box.
Decorate with a leaf from the Fun Fall Framelits and
wooden leave from the autrum Elements.
Use 1/4inch strip of curled DSP and some burlap twine.
 
If you look closely you see she also wrapped
a piece of Chevron ribbon around the box and
tied a bow around it with Early Espresso cotton ribbon.


Truth is... the Ghirardelli is what attracked me.
Of course!
 

Wednesday, October 15

Carmel Apples anyone?

Now ya didn't think I'd really be giving away caramel apples did you?? ... well guess I am really... at least as a sweet paper project treat! This from Cindy another Artisan Designer  at nutmeg creations.

 
 Here's the how to:  
 
 
Of course using the new Curvy Keepsake Framelit Diecut...
with Baked Brown Sugar card stock to make the "caramel Covered Apple".
Glue it down to a Paper Doilie. To get the Real Red mini apple,
use the tag from the same Diecut set.
TIP: Use your paper snips to hand cut the bottom shape of the apple shown above.
 
 
The Black and White straws can be found in most local stores.
Cut them to 6.5inches long. Take the remaining unused end of the straw and
flatten it with bone folder so it could slide into the
Curvy box opening between the two handles.
 
 
How fun to fill these with caramel candies and
 give away to your apple loving friends....