Monday, January 31

Valentine Defined

The new Valentine Defined Stamp Set is just too cute and perfect to make so many sweet Valentine cards... It's one of the new sets in the Occasions Mini Catalog.

I especially love the actual "definition" stamp... here's what it says:

val-en-tine (val'en-tin') n. 1. A
sentiment or greeting of affec-
tion sent to a sweetheart, friend,
or family member. 2. A person
singled out as one's favorite on
Valentine's Day. 3. That would be
*********YOU************


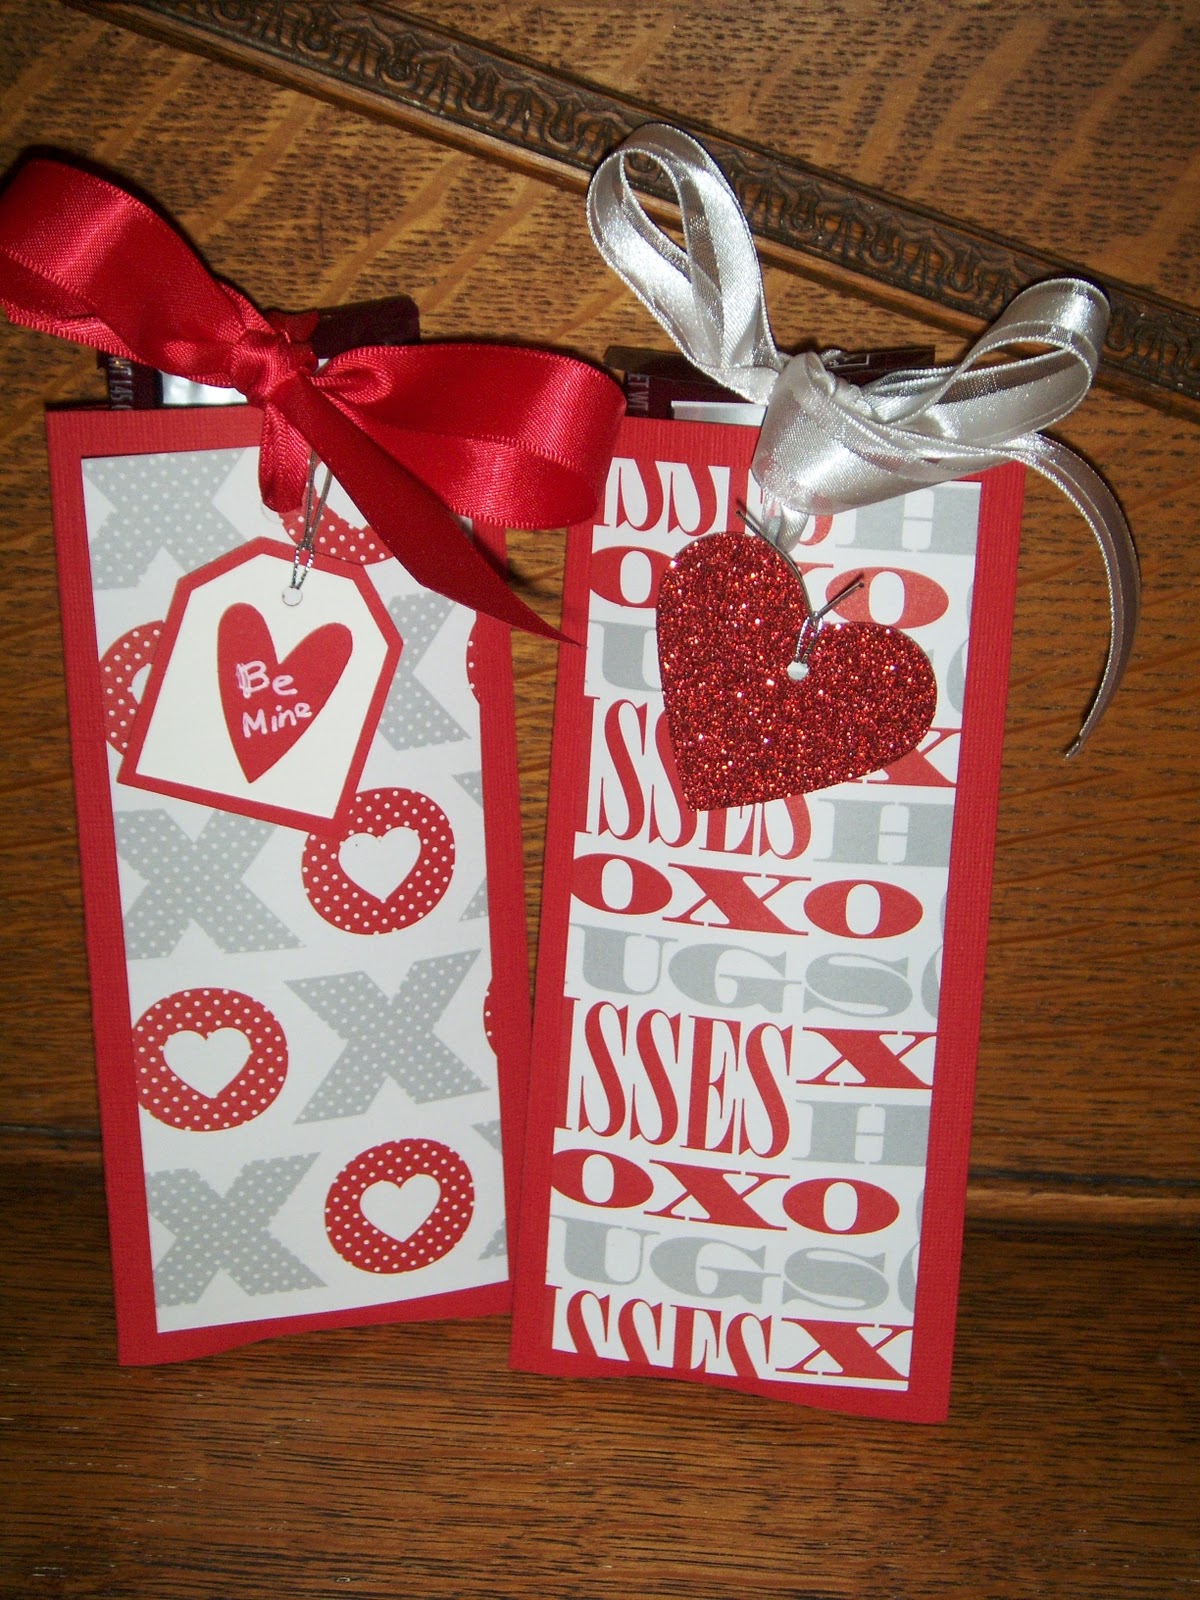
And here's a darling card that Dawn Olchefske made using the set..
again see that awesome Glimmer Red Paper.. just gotta get some!

Valentine-Defined---Dawn

Here's a close up of the enhancement at the bottom
using the glimmer paper with the Love stamp

Valentine-Defined---Dawn-cu


Stamps: Valentine Defined
Ink: Basic Black

Paper: Real Red, Crumb Cake, Basic Black cardstock

Accessories: Red Glimmer Paper, Decorative Label Punch, Modern Label Punch, Pinking Hearts Border Punch, 5/8" Real Red Grosgrain Ribbon, Rhinestone Jewels, Stampin' Dimensionals


Remember Valentine's Day is just two weeks away!!!

Sunday, January 30

Sweet Saturdays

I just couldn't wait for Saturday to get here this week... for my play date with Brayden! We had a wonderful time... he's changed so much now in all the things he is starting to do. Friday he turned eight months old, so he's not quite crawling yet but "rolls" everywhere to get around! And goodness he is so strong! He sits up unassisted too but still his very favorite thing is to stand.. whenever he can... so he loves being in his "Jeep" walker ... I honestly think he might just skip crawling and go right to walking...

At first we just played for awhile in his jeep, buzzing around the TV room and getting his boundaries established!


Then I took him for a walk down Crocker Road to the other side of Golden Sunset... we have many neighbors with horses and various animals... so it was very cute to watch him watch them!

And every time I walk down that way there's one particular home that has a field full of baby sheep... but wouldn't ya know it the first time I take Brayden down there they're not out... but we continued on and found the horses and Shetland ponies.. goodness we even saw the llama... of course Brayden was enthralled with them all.. all he could do was stare and stare and stare.. don't think he knew quite what they were.. probably thinking they were some very large doggies...


After our walk he was ready for his bottle... and of course with all that fresh air he just fell asleep in my arms.... oh goodness I wish I could have got a picture.. but David and Jerry were working down in the garage so there was no way.. but for about 45 minutes he just slept in my arms... talk about heaven!! It was wonderful....

He was up and refreshed and ready to go again.. so after we played and read books and sang songs, I decided to take him for another walk.. this time down the horse trail and around the block...  now that he's sitting up so well it's cool to be able to walk him without putting him in the car seat... he just loved every minute of it.

When we got back Uncle Allen was there....
woo hoo.. so we got to visit too ...


He sat on the kitchen table and played with "daddy"
while I fixed spaghetti for dinner ....


After dinner he sat with "grandpa" on the couch...
like two peas in a pod...


One last photo session before they had to go...


The day went by just way too fast and before I knew it they had to head home...
My heart just overflows when I think of the incredible blessing God has given us....
Good night little Pumpkin'.... I miss you already and love you more.

Saturday, January 29

Fifth Avenue Floral

Here is a card I found on Kay Kalthoff Stamping to Share Blog..... she's from Lino Lakes, Minnesota... I'll bet it's cold up there these days!!

She used one of my all time favorite sets..... Fifth Avenue Floral. It is a set that can be used for nearly every occasion imaginable . . . in this case, for a Sympathy card. She started with a base of Natural White card stock. This card stock is great when you want a sturdy card base as it is a heavier weight than our Whisper White. The mat borders in this card are made from Soft Suede card stock. The bottom of the image mat uses a portion of the Ribbon Punch for an elegant accent.


The designer series paper is from a pack called Elegant Soirée. The only ink on this card is Soft Suede. It was used to stamp the image and then again to watercolor the lily. The sentiments are from the Thoughts and Prayers stamp set.


For the inside of the card she first stamped the flower on scratch paper so she could "practice" coloring. Because she liked how it turned out, she just trimmed it out and adhered it to the inside of the card, rather than trying to replicate it again.... sometimes it seems our "practice" turns out better than the final and we wish we would have skipped the practice session! To color this card, she used an Aqua Painter and ink from the lid of the ink pad. It's important to not use too much water when you use your Aqua Painter. Just keep a paper towel handy and continually tap off any extra water away from the tip.

Stampin' Up! Supplies:

Stamps: Fifth Avenue Floral (Wood Mount 113734), Thoughts and Prayers ( Wood Mount 113252)

Paper: Naturals White (102316), Soft Suede (115318), Elegant Soirée DSP (117163)

Ink: Soft Suede (115657)

Tools: Aqua Painter (103954), Dotted Scallop Ribbon Punch (119275)

Adhesives: Multipurpose Liquid Glue (110755), Stampin' Dimensionals (104430)


I also love the matching Sizzix Embossing Folder you can
get of the Fifth Avenue Floral too..
high recommend having both!

Friday, January 28

Friday Tips & Techniques - Double Slider Card

Have you ever wondered how they make those darling tricky cards that slide up and down or sideways or any which way???? .... well it's pretty easy really.. here's the directions:


1) Punch a divot in the top of your card using the 1-1/4" Circle punch. Punch a vertical slot through the front of the card using the Word Window punch.


2) Place the back slider inside the card, aligning the top of the slider with the top of the divot.


3) Put two Stampin' Dimensionals through the slot and adhere to the back slider.


4) Next, adhere the front slider to the front of the Stampin' Dimensionals.


5) Cover the slot with your front stamped image using Stampin' Dimensionals, and finish by adhering the card edges together.


They are so fun to make and even more funner (is that a word?)  for your friends to receive!!

Thursday, January 27

God Will Take Care of You!

This is one of the cutest YouTube Video's I've seen... it's a two year old little boy with his parents singing at their Sunday School service..... sit back and enjoy... and remember...


.... God Will Take Care of You!

Wednesday, January 26

Plane and Simple

Here's a great "masculine" card yet elegant.. think the guy in your life would admit this is pretty cool... Debbie Henderson thought of this creation and took it a step further to frame it.. what a great gift!


She started out with a background layer of "Whisper White". Then cut two pieces of cardstock into triangular shapes for the second layer and used the Big Shot and the Square Lattice Impressions Folder for the embossing.

She used the Emboss Resist technique on this card. The first step was to stamp the background with the En Francais background stamp, in Soft Suede ink. Using the airplane image in the Plane & Simple stamp set (now available in the new Occasions Mini Catalog) and ink it up in VersaMark ink. Sprinkle the stamped image with White Embossing Powder and set it with your Heat Tool

Using a Sponge Dauber and Soft Suede Ink, gently swirl the sponge over the airplane image and shade around all the edges. Keep swirling around the image until you are satisfied with the ink. Then add another layer of Soft Suede ink to darken the edges closest to the airplane.


Add  Seam Binding Ribbon in Real Red and tie a knot. The sentiment is stamped on a partial piece of the Top Note Die shape. Also sponge the edges in Soft Suede Ink.


Now take off and don't resist the urge to make this card.. yuk yuk yuk!

Tuesday, January 25

Romeo & Juliet????

You're gonna crack up at this one... who would'a thought to create such a card out of punches.. I guess Chat Wszelaki did as I found these on her blog... goodness I think I need to start looking at my punches with a different eye.... just too cute...


The main punches used were Owl and Bat punches.
The sentiment was done using the Designer Series Paper..


RECIPE:
Paper: Real Red, Basic Gray, Whisper White, Basic Black
Designer Series Paper
Accessories:  rhinestones
Tools:  1" circle punch, 1-1/4" circle punch, 1/4'circle punch, owl punch, bat punch


Ya suppose these are Romeo & Juliet... or maybe Adam and Eve????

Monday, January 24

SAS Continues!

OK so to finish up the feature cards from my January SAS....

Be My Valentine Easel Card
This cute card is designed to stand on it's own on desk or counter top..
who wouldn't want to have a continual visual reminder that they are loved!


Build-a-Blossom
I just love the colors in this flower.
Using the new Stamp Set and Punch
 in the Occasions Mini Catalog..


I created this fun little pop out Birthday Gift Card...
the gift tucked into the front
band is removable and
opens up to reveal a sweet Birthday wish!


Surprisingly this one seemed to win the most votes for favorite card...
I called it my Daisy Pop Out... using the Paper Daisy's, I punched a
hole in the front card and put the Daisy on the inside of the card but
pulled it through to the front and created a ribbon stem.. but of course
upon opening the card the Daisy stays in place and voila... pops through
or actually stays on the inside of the card... ya just gotta smile when you see it!


I also set up a Make nTake station and the
gals all got to make a Sweet Treat for their Valentine


I couldn't believe I forgot to get pictures of everyone...
guess I was having to much fun buzzin' around watching everyone!!
But here's a few shots I finally did get...


Thank you everyone for coming!
I'm so grateful to each and every one of you!
It was a blast!
Keep on stampin'!!!!