Wednesday, November 20

One Year Ago

Can't believe it's been a whole year now since my little mishap.... seems like yesterday, yet it seems like eons ago... do you ever feel that way about things? Anywho... glad to report that my wrists, hands, fingers etc are all in tact.... strength continues to improve ... unfortunately my appetite was never affected and that continues to be in full bloom!!!


Here's my photo I posted of me holding my "Get Well" basket that my boss sent me! No face shots were allowed since I pretty much was black, blue, yellow, green and blue.... not to mention my lovely hair-do.... hee hee hee.

 
Guess I can't get out of cooking
over the holidays this year...
but that's a good thing!


Tuesday, November 19

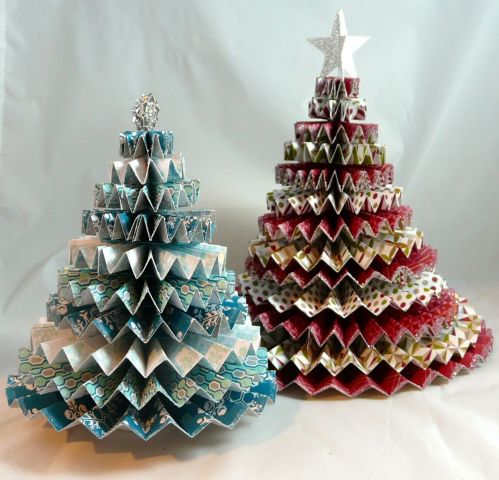
Rosette Christmas Tree!

You're gonna flip when you see this..... well, I did at least...... rosette Christmas Trees!

The big one is all the layers in the tutorial. The smaller one is the last 9 layers of her tutorial. It takes a lot of paper. You really need to make sure you have at least 1 dark layer alternating. In the smaller tree, I used 3 different patterns, a light, medium and dark one. On the bottom, I put a painted dowel to lift it off the table a bit.
P1050786
P1050787
P1050788
P1050791

Monday, November 18

Ms Claus makes an Appearance!

I know it' s not even Thanksgiving yet.... but have you already noticed the Christmas commercials on TV??? amazing... so since they've already started.. thought it wasn't too weird that I would start posting more Christmas card ideas..... so here's one that caught my eye....

Why does Santa get all the attention???? Well, this surely will put the focus on the Ms......

Picture

this that adorable or what??????

Friday, November 15

Turkey Cookies!

It's taken me a while, but think I'm finally getting into the festive mood.... especially when I saw these darling turkey cookies... too stinkin' cute... and Brayden should have fun making these!!

Thanksgiving Turkey Cookies!

Ingredients

1   roll (16.5 oz.) Pillsbury® refrigerated sugar cookies or 1 package (16 oz.) Pillsbury® Ready To Bake!™ refrigerated sugar cookies (24 cookies)    1   container (16 oz.) chocolate creamy frosting     Candy corn     Orange decorating icing     Miniature candy-coated chocolate baking bits    

Steps

Step 1Bake cookies as directed on roll or package. Cool completely, about 10 minutes.  
 
Step 2Spoon chocolate frosting into 1-quart Ziploc® Brand storage bag; seal bag. Cut off tiny bottom corner of bag. On each cookie, pipe frosting on outer edge of half of cookie. Arrange candy corn over frosting for feathers.  
 
Step 3Pipe orange icing onto each cookie to resemble turkey face and feet. Use orange icing to attach baking bits to turkey face for eyes. Pipe black gel on baking bits for centers of eyes.  

CLICK SHARE TO SAVE TO YOUR TIMELINE 

(¯`•.•´¯)¸•´¯`☆
 .`•.¸¸.•´♥

Like ✔ “Share” ✔ Tag ✔ Comment ✔ Repost ✔Follow

Join my weight loss group -click here https://www.facebook.com/kittsskinnybodycare

And please feel free to send me a friend request== https://www.facebook.com/janicekittrell.1


Ingredients

1 roll (16.5 oz.) Pillsbury® refrigerated sugar cookies  
1 container (16 oz.) chocolate creamy frosting    
Candy corn    
Orange decorating icing    
Miniature candy-coated chocolate baking bits  


Step 1
Bake cookies as directed on roll or package. Cool completely,
about 10 minutes.

Step 2
Spoon chocolate frosting into 1-quart Ziploc® Brand storage bag; seal bag.
Cut off tiny bottom corner of bag. On each cookie, pipe frosting on outer
edge of half of cookie. Arrange candy corn over frosting for feathers.

Step 3
Pipe orange icing onto each cookie to resemble turkey face and feet.
Use orange icing to attach baking bits to turkey face for eyes.
Pipe black gel on baking bits for centers of eyes.
 
Gobble Gobble!!!

Thursday, November 14

Amazing Fall Wreath

LeeAnn Greff has done it again... now I wanna copy and create this wreath for sure.. look at the beautiful fall colors she's used here....

Fall Rosette wreath

I promise me this... to take some time and create this soon and very soon!

Wednesday, November 13

Fingerprint Balloon Pillow!

Take a look at this adorable fingerprint balloon pillow... perfect to make some memories in addition to a darling decorative pillow! Found on the I Love to Create blog!


They started with a blank pillow cover found at Ikea.  It was a few dollars and it has a nice zipper in it which is great for washing.  They created a freezer paper stencil of a bike. You cut the paper and then iron it onto the fabric to seal it on.  You can usually use paint with these stencils, or if you're feeling lucky just use fabric marker pen.. it's faster!


With a stencil it's super easy.  Even if you color out of the lines,
 it won't show because the stencil is forgiving.


Peel it off and your image is perfect.  After you remove the stencil,
add a few lines for balloon strings.


Then color your finger with Tulip fabric markers
and stamped it to create ballooons.


You can also use the Scribbles fabric stamp pads
to get a wider variety of colors.  The finger stamping is really easy.
You can't do it incorrectly.


And here's the finished pillow.

 I think it would make a cute shirt as well.
Ya think???

Tuesday, November 12

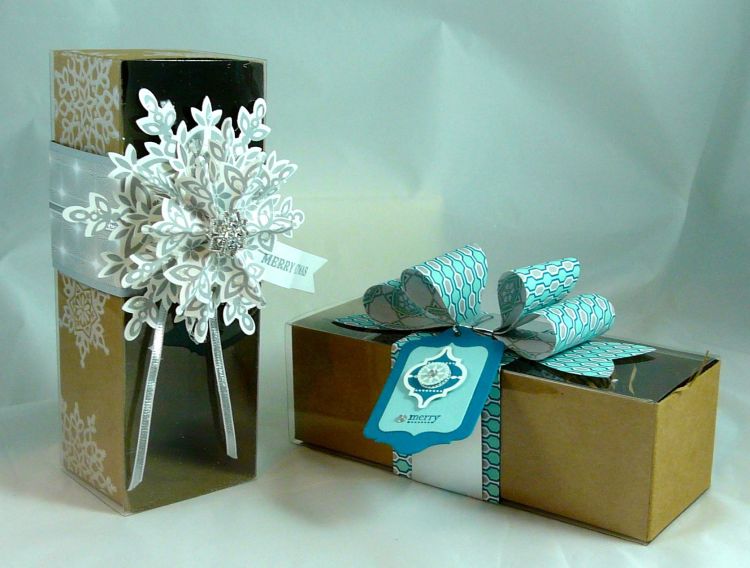
Boxes and Bows and Bags!

I'm getting ready for my Secret Santa Workshop to be held December 7th and this year I'm going to have a few more projets than cards... thus calling it a Workshop rather than a Stamp-a-Stack.

Here's a sample of the Tag a Bag Boxes that the gals will get to make one of their choice....

P1050773

P1050776

P1050778

And for the Bags.. I previously featured my Elf Bags at my Fall Festival, but in case you missed it.. here they are again...

P1050717


P1050770
 
Did ya catch that gift tag???
Have Your Elf a Merry Little Christmas!
 
You better sign up quick...
seats are filling up!