Wednesday, August 31

August Card Swap

Well I did get a few things accomplished this weekend.. while sitting inside with the AC on.. goodness it was hot!... but certainly can't complain when the East Coast is recovering from Hurricane Irene.... that was amazing!


See that awesome Fabulous Florets stamp set strikes again... I used it for my August Crazy Card Club swap ... our theme was "vintage" so I love this bird cage from the Nature Walk set with the flowers from the Fabulous Florets set ...  I randomly stamped the flowers on Very Vanilla card stock using Soft Suede and Sahara Sand inks. On a separate card stock I stamped one large and one small flower using Night of Navy and cut them out to pop them up on the card to give dimension.  The ribbon is also Night of Navy topped off with an Antique Brad.

I sponged the edges with Soft Suede and lightly dabbed it as well on some of the flower centers. I stamped the bird cage in Navy and used Olive Olive, Night of Navy and Bravo Burgundy on the flower stems around the bird cage. Lastly I added the bee and sentiment and voila.. was complete!


I had stamped extra flowers just in case... so with the leftovers I created this very very very simple card... just started popping them up on plain card stock...


and here's the inside.....


While I was at it I also wanted to get my Sisterhood of the Travelling Card Club done too.. August theme was "fun or silly"... so I pulled out my old old old Holy Cow stamp.. embossed in black ink and went to town quickly painting the blue shadow on the cow and of course did the halo too... I think he's just too cute...


I had printed the Holy Cow sentiment on the front .... and on the inside I was going to write .... It's your Birthday Again?? but decided to leave it blank so each member could write whatever they'd like... perhaps will use it as a Thank You card and put ... That was Awesome.. or I'm so Grateful... or some such words inside...


I've been dying to use my new little SU Haunted Halloween stamp sold a'la Cart...  you can't see the great dimension in this photo, but it's embossed using black ink and then colored in the shadows and pumpkin ..... was a piece of cake... or should I say a piece of pumpkin pie!!


I used this for my September swap for both clubs. I dropped them off at the Post Office on my way to work so watch your mailbox this week ... at least, those of you who swap.... and if you don't.. and want to join in our fun each month, let me know and I'll add you to the Club! It's always fun to have new cards to steal ideas from... er uh, I mean fun to have new talented members... hee hee hee!

Tuesday, August 30

Punch Crazy Woman!


I wish I had enough time to sit and play with all my punches.. like Ellen Kemper does on her blog.. she's the bomb.. acually she's the queen of punches... here's a few of my favorites from her... just amazing.... do these bring back some memories or what???


It just goes on and on... how cool is that!!!

Monday, August 29

Looking Forward to Fall

Are you guys looking forward to Fall??? I am!! If you haven't heard yet, Jerry and I are going to "New England in the Fall"... woo hoo... checking that off my bucket list! We're visiting my dear friend Carol at her Apple Farm in Maine.... so we're actually going to "work".... well, for us it's fun.. but for her it's work.. she's been there since July.. picking apples, making apple cider, apple pies, apple sauce, apple syrup, apple pancakes, apple muffins, apple cake, apple bread... uh.. did I leave anything out?? 

It will be peak season to see the Fall leaves.. I can't wait since I've never been!!! I think it will be here before we blink! So here's a card in anticipation of Fall .. made by Linda Fisher.... and the famous Lovely As A Tree stamp set... and a little bit of dried flowers...


       014

Here’s a closer view ~

006

The tree is stamped in Early Espresso, and the trunk is colored with Stampin’ Up marker and then dab glue here and there wherever you want the dried flowers to stick.  After the glue dries just shake the excess off and admire!

                  007

The inside ~

                  005

This doesn't mean Christmas is right around the corner, does it?

Sunday, August 28

Paper Quilling Technique

Mary Fish is at it again... she has lots of great ideas and I so appreciate it... and Mona.. look .. this one's for you!!

Stampin up mojo monday quilling technique punch rubber stamps video


Aren't those mod little flowers the bomb!  The technique of "quilling" was featured this month in our Stampin' Up! demonstrator magazine.  Once you see how easy it is, you'll be hooked!

HERE'S SOME GREAT TIPS TO ENHANCE YOUR QUILLING PROJECTS:
  • Stampin up fabulous phrases rubber stamp mojo monday punch quilling technique Attach  a circle to each quilled flower.  This adds color, pattern and definition.
  • Use Designer Series Paper as background filler.  Be sure to stock up on Stampin' Up! DSP during the Buy 3, Get 1 Free Promotion.  Ends this week on the 31st.. hurry!
  • Stampin' Up! Jewels Basic Pearls.  Yum!  They as so quick and easy to use.  The "string of pearls" along the Marina Mist vertical strip, is so glamorous.
  • Layering ribbon offers a completely fresh look.  Marina Mist 1/8" Taffeta Ribbon wraps around Pear Pizzazz and pops up through the button for a sweet bow.  
Paper Quilling offers so many 3-D possibilities.  Here's Mary's quick video tutorial where she shares some of the basics to get you started by just using a paper piercing tool and strips of DSP.


I like the "spit" part best... did ya catch that?

Saturday, August 27

September Holiday SAS

I'm so ready for a weekend and hope to get lots done today... I'm feeling behind in getting ready for my September Stamp-a-Stack on the 17th....  because it's Holiday theme I'm waiting for some supplies from my SU order... new goodies from the mini Holiday catalog! Demonstrators can purchase limited items early so they are prepared for Workshops when the catalog is revealed September 1st. Prepared is the key word... oops!

Here's a sneak peek at one of the cards you'll be making..... that is if you're all signed up..... remember I'll have three Halloween cards, three Thanksgiving/Fall cards, and three Christmas cards plus one make n'take for each holiday!!! My wheels are spinning!!!!


It's vintage and Christmas all wrapped in one!


Love the snowman on the crumb cake paper..
gives it that real artsy-craftsy feel!

Seating is limited so ya better hurry!
Remember, if ya wanna play, ya gotta pay!!!

Friday, August 26

Monkey Buisness?


This is absolutely adorable!!! I love all the little baby clothes with the monkey theme you see these days ... just too sweet... and take a look at this cute little fellow.... made by Linda Fisher... again she is one of the best "punch art" stampers I've seen!

001

Its' pretty simple as she just used:
  • SU punches
  • SU DSP
  • SU sentiment
Here’s looking a little closer -

002

Two circle punches and a couple eyelets made the bib. 

The monkey was another story. Here’s his recipe:

Head – two circle punches, one circle was trimmed out with a heart punch to give him that little indentation at his forehead.

Eyes – Owl Punch
Ears –  circle punches
Mouth – small oval
Body – Owl Punch and the 15/16” oval punch
Tail – A trimmed out piece from the Swirls and Scribbles die
Arms and Legs – Oval punch
Bananas – Circle punch

Each piece of Creamy Carmel card stock was sponged with Early Espresso Ink.

                       006

Supplies needed – All are SU! unless otherwise noted
  • Card stock – E. Espresso, C. Carmel, W. White, B. Black and A. Appeal and Bo Bunny DSP
  • Letters for BABY were heat embossed with gold emp
  • Stamp set – Whimsical Words, other letters were misc.
That's enough monkey business for today....

Thursday, August 25

Back to School ... dedicated to Holly!

I can't believe Summer is nearly over.. and so many kids have already started back to school... and I told you Holly got a teaching job at Lake Elementary in Vista School District as one of their First Grade Teachers!!!  They actually started last week. It's very exciting and we're super uber proud of her... and wow... realize now how much work it is to start up with a new classroom....  hours and hours these teachers put in... even before the kids even step into the classroom!

So I found this darling "Teacher Appreciation" Candy holder from Linda Fisher and wanted to share it with all of you... and especially dedicated to Holly!


                     001

Please keep in mind that you can also make this worm any size you like just by increasing or decreasing your size in punches.  You can make him longer by increasing the number of punched circles.  You can make it your own by best suiting your needs.

WORM
001

EYES
002

After gluing one on top of the other, you’ll glue these on the very top of the small oval (head).

BOOKS AND APPLE
                       004

First using your Word Window punch, punch one, then put it back into the punch from the side and punch again.  Result will be the small piece on the bottom of the picture.  You will need to cut three of these.  One in blue, yellow and green.  No particular length.


006

Mount each piece onto a piece of scrap paper.  Any excess paper will have to be trimmed off.

The apple (MS punch) was punched in red, punching again with a small piece of Old Olive card stock. Glue this green piece over top the same portion of the red piece giving the leaf more dimension.  The apple was mounted on the top book off to the side with a dimensional.

CHALKBOARD
                  008

The TomBow Multipurpose glue is a must for any project of this size.  It is the best!!  If you don’t have it…you need to get it, you won’t be sorry.

                   013

You can get these raised sheets (12x12) at a local craft store to use for the chalkboard.  Use Stampin Ups sanding blocks to sand the raised letters and numbers to give the chalk appearance.  Each piece is cut 1 3/4” x 2 1/2” and placed on top of the easel.

WRAPPER
                           016

Cut a strip of paper 3” X 9” scoring at 3/4”, 5” and 5 1/4”.

                     018

Then fold.  Mark where your holes will be, place the candy bar in between the card stock and punch your marked holes.  Run ribbon through. Attach your Worm artwork to the front and give to your favorite teacher to encourage them and thank them for all they do for our kids!!!

                           001

Who thought we'd ever be inspired by a worm?????

Wednesday, August 24

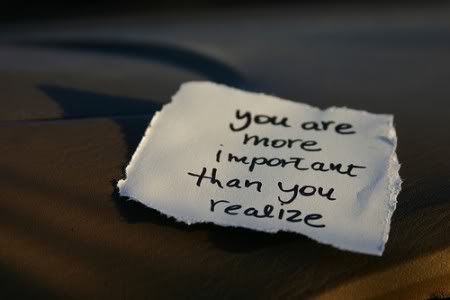
Just wanted to remind you....

Photobucket

You is Kind
You is  Smart
You is Important

Tuesday, August 23

Haunted Halloween

I'm getting ready for my Holiday Stamp-a-Stack  September 17th (be sure to sign up for it soon!)..... and loving the new little a'la carte stamp Haunted Halloween in the new mini Holiday Catalog.... here's a cute treat bag... hummm.... might be a good starting point for a card....

CF Holiday Mini August Blog hop

Got the idea from LeeAnn Greff... here's what she did:

First I punched out a 1 3/8" circle from a post-it note and adhered that to my Whisper White card stock. Then I inked up 1" of my brayer with Pumpkin Pie ink and brayered that over the top of my Whisper White card stock.  Then I flipped it and brayered Elegant Eggplant ink onto the bottom.  The colors meet and blend in the center a bit. Remove the post-it circle and stamp the image in Black ink.

See the sparkle?  That is our newest Iridesent glitter glue called Dazzling Details.  Just squeeze it where you want it and let it dry.  No messy glitter all over! 

Gotta love the glitter!!!

Monday, August 22

Sorry I'm Late!


Well, how many times a day do you have to say that... sorry I'm late! Hope not too many... but seems lately I've been late more times than early.. don't like that... even set my clock ten minutes fast but somehow that isn't helping! Could it be we're trying to cram in too many things in one day? Yup.

Well even though we'll work on that... here's a cute card to make should you happen to miss some one's birthday.... cute idea from Chat.. she's awesome... and bet she's not late to anything... especially her stamping time!


RECIPE:
Stamps:  Turtle and Co.
Paper:  Basic Gray, Tempting Turquoise, Whisper White, Pattern DSP
Ink:  Basic Black and Craft, markers
Accessories:  satin ribbon, jumbo brad, glitter
Tools:  Heating Tool, embossing powder, Big Shot, Perfect Pennant die cut, circle punch, piercing tool, decorative label punch, Stripes IF, dimensionals


I'll probably be late for my own funeral....

Sunday, August 21

Basket Full of Berries!

Have you ever tried Basket Weaving? I've always wanted to create a flower basket card... and found this darling one again from Joan Norris.... it's a basket full of berries... and here's how she did it...  look at how cute the strawberry is... what a clever idea!

I used Crumb Cake Cardstock (120953) to make the basket. I cut the strips 3/8 inch and wove them into a basket. Then I wove a larger strip on the top of the basket. That one is ¾ inch. I folded all of the strips toward the back after using snail adhesive to secure the ends. Trim the ends about ¼ inch and use snail adhesive on the back of the basket to secure all of the PPA 103 002 end pieces. I used a Sponge Dauber (102892) and my Crumb Cake ink pad (121030) to give a bi t of color variation to my basket. I wove my pieces of Lucky Limeade Ruffled Ribbon (122977) through the top loops of the basket. Tie a knot, attach the ends to the back of the basket, and trim the ends of the ribbon at an angle. I made some strawberries in Calypso Coral Cardstock (122925) using the Big Shot (113439), and the Scalloped Heart of Hearts Embosslit Die (117332). The leaves on the strawberry are cut with the 5 Petal Flower Punch (119880) out of Lucky Limeade Cardstock (122926). I just cut three petals off of the flower to use as leaves and attached a strip for the stem.  Strawberry Paper from the Berry Blossoms DSP  (123142) with background paper from the Domestic Goddess DSP (123150).  I cut out 2 sections of strawberries to go in my basket. I used a base of Pool Party Cardstock (122924), and cut a strip of this paper with the Lace Ribbon Border Punch (122362).  I added some pearls for the finishing touch.

Just perfect for a summertime treat!

Saturday, August 20

He Loves Me.... He Loves Me Not.....

He Loves Me.... He Loves Me  Not.... how many times did ya go through that little scenario in junior high school... over some cute new boy in class or maybe even in college class... hummmm....

On that note, today’s card reflects my favorite daisy ... but it's losing petals.... just too cute and again created by Linda Fisher


    023

Use the Daisies #2 die, pulling one petal out here and there. 

     007 

She made the diamonds on the bottom of the card by hand, scoring each one 1/2” apart.  The stem was stamped and snipped out.

              004

Supplies needed – All are Stampin’ Up!
  • Card stock – W. White, O. Olive and Letters to Santa DSP
  • Tools – Daisies #2 die and circle punches
  • Stamps -  For All You Do and Vintage Labels
  • Misc. – O. Olive ribbon and O. Olive Ink
So did you end up with He Love Me?????
Hope so!

Friday, August 19

Scare Crow?

Well there's nothing scarry about this card.... just a darling "scare crow" who loves watermelon! Quite a different "crow" than earlier this week... he's just too funky!
 
Linda Fisher created a Sliding Pop Up Card.  She attached ribbon for the legs giving the crow the best set of ‘Knobby’ knees in town.  

        014

To get it to pop up….pull out on the small green piece between the two ribbons.

011 009

Not only does it pop up, but reveals a small message....
‘HELLO’ stamp from the set Happy Greetings.

Looking a little closer~

      012

Supplies needed ~ all are SU! unless otherwise noted
  • Card stock – M. Mustard, W. White, R. Red, B. Black, G. Green and Big Top Birthday DSP
  • Tools – Various Circles, Boho Blossom, Ovals, Scalloped and Blossoms Petals Builder punches
  • Misc. – M. Mustard and White Craft Inks for sponging the edges

Makes ya wanna go on a picnic!